
Introduction
We have had our Sproutbox for just over a year now, going into our second gardening season. We were gifted our garden as part of their Brand Ambassador program to test out the product and provide our readers with an honest review of the product. In this review we will take you through the garden we own, who Sproutbox is, our experience building the garden, the cost of these raised beds and our overall thoughts. Enjoy!
We earn revenue from the products available on this page as part of their affiliate program. It does not cost you anything to use these links, but helps support our business. Use the discount code UGC10 to save 10% on all their products.
Our Sproutbox Garden at a Glance
Size
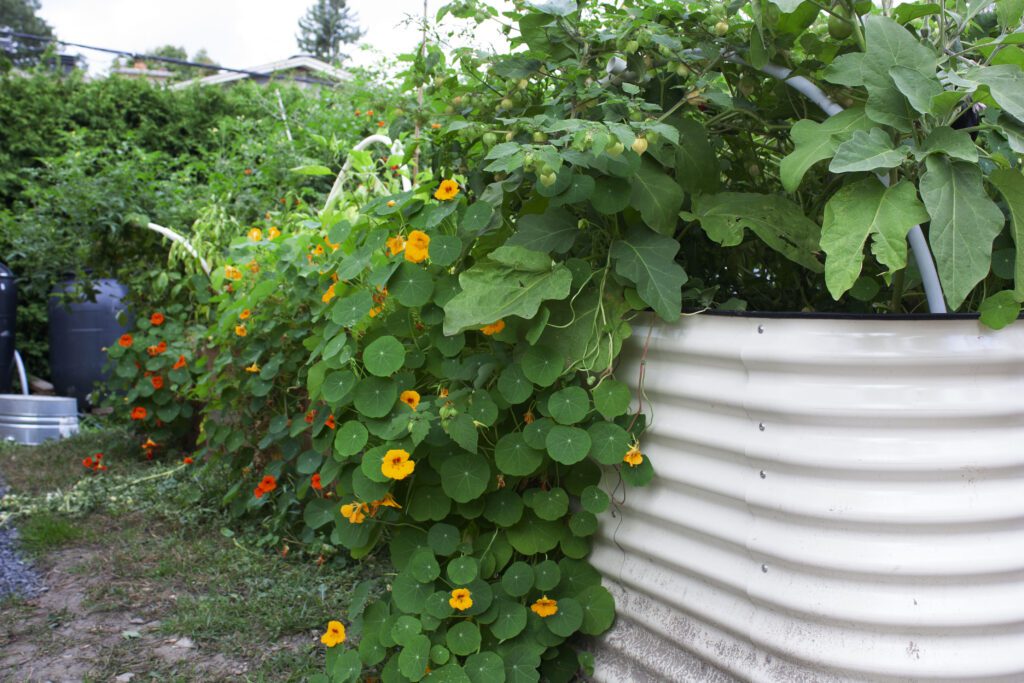
Our garden is the 9-in-1 32″ raised garden bed in the 5’x5′ configuration
Capacity
The 5’x5′ configuration is the largest size possible, at 25 square feet of planting space and 2.5 cubic yards of soil capacity.
Colour
Pampas
Pros
- The exterior colour is very aesthetically pleasing
- The height requires less bending when gardening
- It is expected to last a long time
Considerations
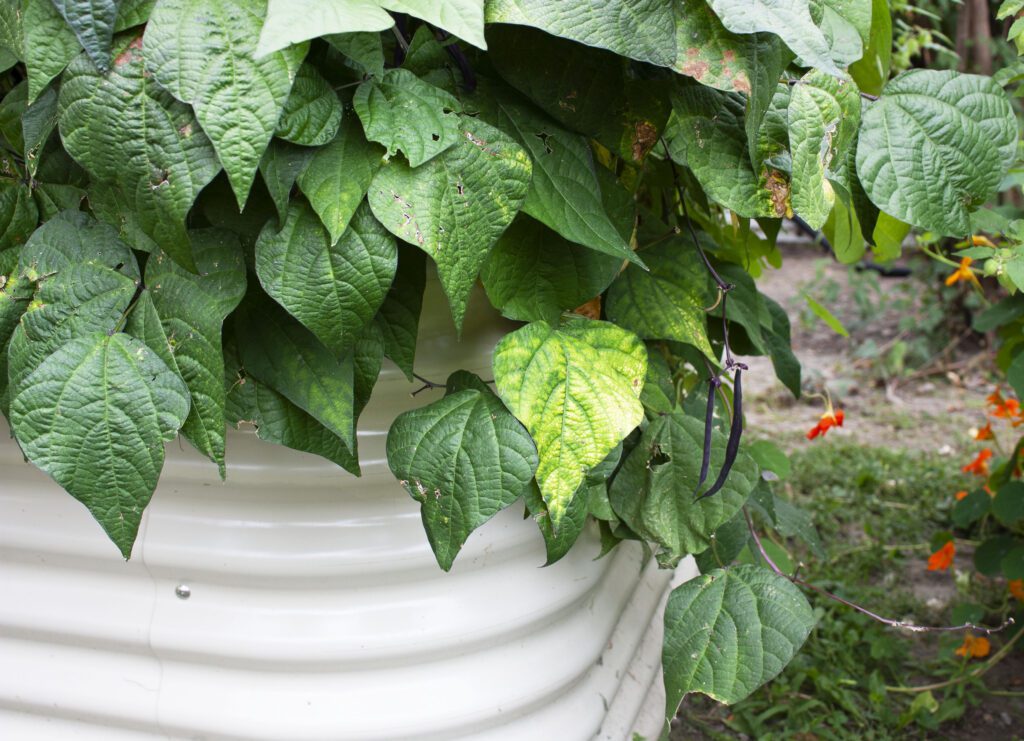
- Because of the colour we chose, the bottom gets very dirty when large rainstorms hit the ground and kick up the dirt around the garden
- The shape we chose makes it difficult to reach the centre of the garden
- It requires a lot of soil to fill which can be expensive
Purchase our SproutBox Garden 9-in-1 garden kit here (save 10% with the code UGC10)
What are Sproutbox Garden Raised Beds
Sproutbox Garden is a Canadian company that specializes in raised gardens made from aluzinc-magnesium steel that are expected to last up to 20 years in the outdoor elements. In addition to the frame, all hardware is made out of stainless steel. These gardens are meant to be 100% recyclable when the time comes to replace them.
Building the Sproutbox Garden

When we first received the garden we were surprised with how small the box was – however it was heavy. Each garden kit comes with panels, the hardware, an instruction manual, tension rod and a rubber edging to install at the top of the garden.
After taking inventory of all of the pieces, the first step was to remove the plastic film on each of the panels. For us, this was the least enjoyable part of the entire setup, for two reasons. The first was, by the time we had pulled off all of the film, there was a lot of plastic waste. The second was that it was very sticky and time consuming to remove (over an hour). The film is there to protect the colour and panels from damage, however we would have preferred no film on the garden panels at all.
The next step was to put the panels together in the configuration chosen (or the predetermined garden). This was really simple to do, and can be done by one person, mostly by hand. Because we have the 32″ garden, the most difficult part building it alone was being able to reach the bottom of the panel to install the bolts and nuts, while holding the panels together. The 32″ garden would be easier with two people, but it is possible to do it alone.
One mistake that we made when attaching the panels was not paying attention to the corner pieces. We installed some of the corner pieces with the panel edges inside the garden, and others we installed where the edges were on the outside. We recommend carefully reading the instructions and trying to stay consistent, because it looks much better when all corners are installed the same way.
Once all the panels are installed, it’s time to install the tension rod. We’re not sure if we installed the tension rod correctly or not, but the rod tugs on the side panels of our garden causing it to pull inward/indent. Apart from being concerned we did it wrong, it hasn’t caused any issue other than the indents are noticeable.
Finally, the rubber edging gets installed. It was quite easy to add, however it does take some force to install it around the corners.
Overall, it was a fairly straightforward build that can be done in an afternoon by just one person.
If you’re enjoying this content, consider subscribing to our newsletter!
Raised bed options – from shape to colour
One of the great features of Sproutbox Gardens is the amount of customization that exists.
They have multiple shapes available for sale. You can get round, clover, U-shape or even L-shape gardens. The possibilities allow you to create a unique garden space, unlike anyone else.
Not only do the gardens come in multiple shapes, they also have multiple heights to choose from. The heights come in three options; 8″, 17″ and 32″.
Finally, the gardens come in three different colours: pampas, eucalyptus and slate grey. We chose the pampas colour because it felt unique for a metal raised bed.
How much does it cost?
When budgeting, make sure to include the cost of both the garden bed and the soil required to fill it.
The garden
Sproutbox Gardens range in price from $80 to $1,200. The average price is from $300-$500 dollars.
The soil
These gardens are bottomless, which means they must be filled completely. When budgeting for your garden, it’s important to look at the capacity of the garden to understand the cost to fill the raised bed.
For example, the 32″ garden in the 5’x5′ configuration holds 2.5 cubic yards of soil. That is a lot of soil! To help with the cost of soil, we recommend filling the garden with branches and trunks, like the Hugelkultur method. Additionally, we layered the bottom of the garden with cardboard to help prevent any weeds from growing into the garden from below. One item to note is that with this method, the soil will settle over the season and winter, so you will have to top up the soil in the garden the following season.
Overall experience using the Sproutbox raised garden
We have had our Sproutbox Garden for just over one year now. So far, it has held up as perfect as the first day we built it.
One thing to note is that the configuration we chose (5’x5′, 32″ high) is very awkward to use! The centre of the garden is difficult to reach and 2.5 cubic yards is a LOT of soil, it was more than we thought it would be. However, both of these are mistakes that we made and we are thinking about changing the configuration at some point to make it easier to use. If you intend to invest in a 32″ garden, we suggest doing it in any other shape where it is easier to reach around the garden.
What we like the best about the garden is its longevity. We don’t have to worry about the garden breaking down and having to do all of the tasks that come along with it.
Overall, our personal thought based on what we have seen online, is that Sproutbox Gardens look best when multiple gardens are bought and placed together.
Is it worth the money?
The answer to this question depends on your garden goals.
If having metal raised gardens is important to you, Sproutbox has the best selection of large gardens, with many configurations, to make a unique garden.
If you are budget-conscious, or aesthetic is not your priority, than this may not be the right direction for you. There are other metal raised bed companies in Canada that have lower prices, but with limited colour and size options. Please be aware, we don’t suggest metal gardens off Amazon at this time due to the quality that is currently available.
If you are looking to create a chic garden aesthetic, and have a generous budget, we highly recommend Sproutbox Gardens!


