
Tomatoes are the quintessential garden plant.
Every gardener grows them, whether they like them or don’t! Quintessential or not.. that doesn’t mean you need to grow them.. but you’re here so, we assume you must like tomatoes!
Tomatoes are a new gardener’s best friend because they are simple to grow, hard to kill, and very reliable.
Today you will discover which varieties are best for you and how to grow them from seed to harvesting the tomato bounty of your dreams!
In this article
Some of the links in this article may earn us a small commission, at no cost to you.
Varieties
Picking which varieties you want to grow is a fun, and crucial, step!
With so many varieties out there, the all important question is: what type of tomato do you want to grow? Cherry tomatoes for salads and curries? Sauce tomatoes for salsa and canning? Tomatoes for sun drying? Or tomatoes to slice up and put on a delicious sandwich?
Knowing how you want to eat your tomatoes will help you determine which type of tomato to grow.
Determinate vs. Indeterminate
Two of the most common words you hear when growing tomatoes are determinate and indeterminate. These words can seem scary if you are new to growing tomatoes, but they are actually very simple.
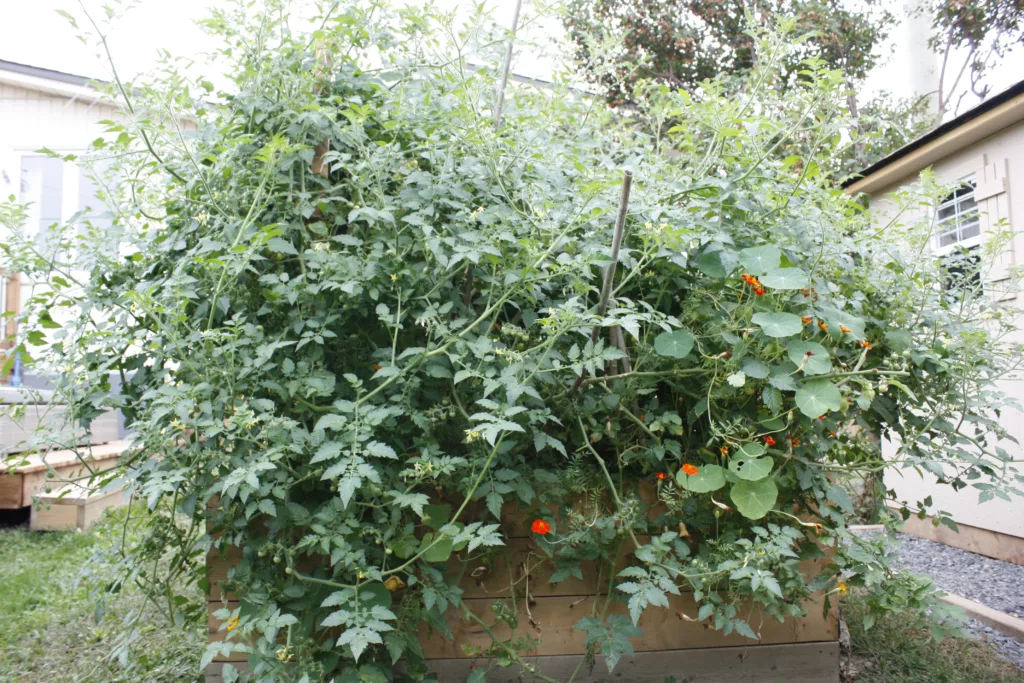
Indeterminate plants will grow endless stems, leaves, and fruit if you allow them to. Indeterminate just means that there is no specific height, size, or amount of fruit that it can grow. If you don’t prune your tomato plant, it can grow 10 feet tall, produce a ton of tomatoes, and take over your garden (As you can you see in this photo. This is one tomato plant!).
Determinate means that the plant will grow to a determined height and produce a set amount of fruit. These plants are good if you grow on a balcony or have limited amounts of space. One thing to note is that because there is a set amount of fruit that grows on these plants, once they reach their maximum height and produce fruit, they will be done for the season and won’t produce any more. However, with our short growing seasons this doesn’t pose a major issue.
Most tomato varieties on the market are indeterminate. So, if determinate tomatoes are better suited to your space, look for those specific varieties only.
If you’re enjoying this content, consider signing up to our newsletter!
How to Plant Seeds
Tomatoes are heat loving plants, which means the seeds will germinate quicker in warm soil. Tomato seedlings grow quickly, so we recommend starting them 6–8 weeks before your last frost date, but no sooner. Starting seeds too early means you need more space, more soil, and larger pots. When plants are grown indoors for too long, it can stress them out and cause them to stunt, so starting them at the right time is important. For a comprehensive guide on how to start seeds, check out our article here.
To plant the seeds, use sterile seed-starting soil, like this peat-free blend, and fill it in seed trays. Plant the seeds at a depth of 2-3 times the width of the seed and cover them with soil. A general rule of thumb is – it’s always better to plant too shallow than too deep.
If the soil is not already wet, water the soil. Place a clear dome over the trays and put it on a heat mat. If you don’t have a heat mat, that’s okay. Tomato seeds will still germinate without one, but will take longer to do so. If you have a warm, sunny part of the house, place the seed trays there.
That said, we do recommend investing in a heat mat for seed starting. They’re a small investment that provides a lot of benefits. If you’re looking to add to your seed-starting setup, we have a guide that goes through all the equipment you need, with multiple budgets in mind!
Continue to grow your knowledge with these other articles:
- How to Protect Your Plants from Cucumber Beetles
- How to Grow Cucumbers From Seed to Harvest
- What the Calgary Water Main Break Can Teach Us In Our Gardens
- Drowning in Kale? Here are 9 Ways to Use Your Harvest!
- How to Grow Bush Beans from Seed to Harvest
How to Transplant
Indoors
When your tomatoes have sprouted and their first few sets of true leaves have grown, you will want to pot them into a soil blend with more nutrients. Plants in the nightshade family, such as tomatoes, are able to grow roots from their stems. What this means is, when you transplant your tomatoes, if you plant part of the stem into the soil, it will grow new roots, making the plant much sturdier.
You can remove the seed leaves (cotyledons) to be able to plant it deeper. If your plant has 5 or 6 sets of true leaves, you can remove the bottom leaf branches to plant it even deeper.
One thing we recommend is that, if your tomato plant starts flowering indoors, pinch the flowers off. This advice is specific to indeterminate tomatoes only, and we don’t recommend pinching off flowers on determinate varieties.
The reason you pinch the flowers off is because, when you’re ready to plant them outdoors, you want the plant to focus on root growth over fruit growth. If you plant them out with flowers, the plant will focus on growing tomatoes, rather than growing into a full size plant.
Outdoors
Before you can plant your tomatoes outside, you will need to harden them off. Tomatoes shouldn’t be planted out until all danger of frost has passed and the nighttime lows are consistently near, or above, 10°C.
Once they are properly adjusted to the outdoors, pick a sunny spot to plant. Tomatoes need full sun to grow well (6-8 hours of direct sun a day). Similar to indoors, plant the tomato a little deeper than it currently is in its pot. Make sure to water the tomato once it’s been transplanted.
We recommend supporting your tomatoes on the same day that you transplant them. Tomatoes can get large and heavy very quickly. Adding support later in the season is difficult because you can damage the plant roots, and often the tomato has grown in weird ways that are hard to support.
There are several methods to support tomatoes that exist, and each depends on personal preference.
Some support methods include staking, the Florida weave, trellis, or with a tomato cage. Note: We only recommend using tomato cages on determinate varieties, as indeterminate tomatoes outgrow tomato cages very quickly.
Intercropping
Intercropping is the concept of mixing multiple types of plants together in the same space. This method is often used in market gardens and is the opposite of what you see at large-scale farms (monocropping, or planting a single crop).
Here are three different plants that you could intercrop with your tomatoes to help ward off or fight pests.
First up is basil. The aromas and scents in basil help mask the smell of the tomato plant, which helps “hide” it from predatory insects. Growing basil beside your tomato plant may help reduce the chances of the Five-spotted hawk moth from finding your tomato. Plus, basil and tomato cooked together are the ultimate duo.
We are going to group our other two suggestions together since they both play similar roles. Plant sweet alyssum or dill near your tomatoes. Both sweet alyssum and dill flowers attract parasitic wasps, and these are predators of the tomato hornworm. But don’t worry, parasitic wasps don’t sting!
Tomatoes are self-pollinating which means they don’t rely on pollinators, such as bees, to create fruit. However, there are studies that suggest that when pollinated by insects, fruit tastes better and lasts longer. Our point is, planting flowers or flowering herbs near tomatoes isn’t essential, but makes for good practice.
Caring for your plant
Generally, tomatoes are easy plants to care for. Here are a few tasks to keep your plants healthy:
Pruning
Prune your tomatoes to allow airflow around your plants. Remove lower leaves to avoid crowding out other plants. You can also remove larger leaf stems anywhere on the plant to help provide airflow. When doing this, use sharp scissors, shears or a knife. Damaging the stem while pruning leaves the plant more susceptible to disease.
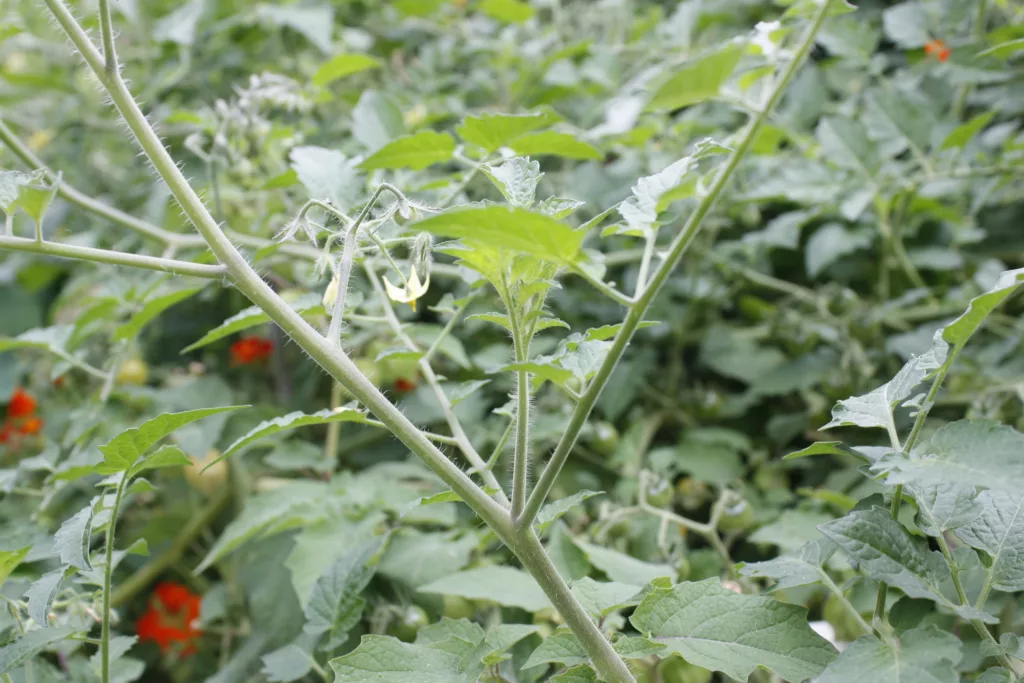
Indeterminate tomatoes will grow new plants out of leaf stems (called suckers). If left unpruned, your tomato will grow endless new suckers, which are essentially new plants. These suckers will grow as large as the main stem and will put out additional fruit. Removing the suckers helps channel energy to the fruit on the current stems and won’t harm your plant. We try to maintain only a few stems on our tomatoes just to keep the plant at a size that we can manage. When you allow the plant to grow endless suckers it can take over your entire garden, and pruning can take hours to maintain.
Support
We recommend supporting your tomato plant on the same day you plant it. As your plant continues to grow, you will need to continue attaching it to the support system.
Tomato plants naturally grow along the ground, so because of this, new suckers or stems tend to grow parallel to the ground. If you don’t maintain the support structure, your tomato will find itself growing horizontally, which is much more difficult to support as the plant grows heavier and becomes less flexible.
Monitoring
Monitor your plant regularly for any signs of disease or pest damage. The common issues with tomatoes are mentioned in the next section below.
Get gardening content just like this, straight to your inbox!
Common pests & problems
Blossom End Rot (BER)
This is when the bottom of your tomato is black, soft, and rotten. It doesn’t happen often, and some people suggest it’s related to a lack of calcium in the soil, but that isn’t necessarily the case. Often times, blossom end rot only happens on the first few fruits on your plant, and then it will stop. If you first notice BER when you are picking your ripe tomatoes, you can actually cut this part off and eat the remainder of the tomato. If you spot BER before the tomato finishes growing or ripening, pick those tomatoes off the plant and throw them in the compost. This allows the plant to move its energy to healthy fruit.
Tomato hornworm
The most common pest for tomatoes is the hornworm. These are the caterpillar form of the Five-Spotted Hawk Moth. Hornworms are large caterpillars that blend in really well with the foliage of tomatoes.
There are two tell-tale signs you have hornworms. The first is when you find only the stems remaining on the leaf, as the foliage has been completely eaten. The second is the large frass (insect poop) on the tomato leaves. If you spot either of these, you likely have a hornworm.
If you find a tomato hornworm that is covered in white, oval “balls” or “eggs” on its body, leave it alone. Those white “balls” are actually parasitic wasp cocoons. The hornworm is basically dead at this point (it was eaten from the inside out), and those cocoons will have parasitic wasps emerging from them. Parasitic wasps are our friend in the garden, so allowing them a safe space to complete their life cycle is important.
I know, I know, that sounds so gross, and the caterpillar is already freaking you out, but our gardens are here to support beneficial insects, as much as they are here to feed us!
If your tomato hornworm shows no signs of parasitic wasp cocoons, you have two options. The first is moving it to a new spot, far away from your garden. Why? Because the hornworm may already have parasitic wasp eggs inside its body that you can’t see, and you’re allowing them the chance to grow into new, beneficial garden friends. The second is to handpick the hornworm off and drop it into a cup of soapy water.
Blight
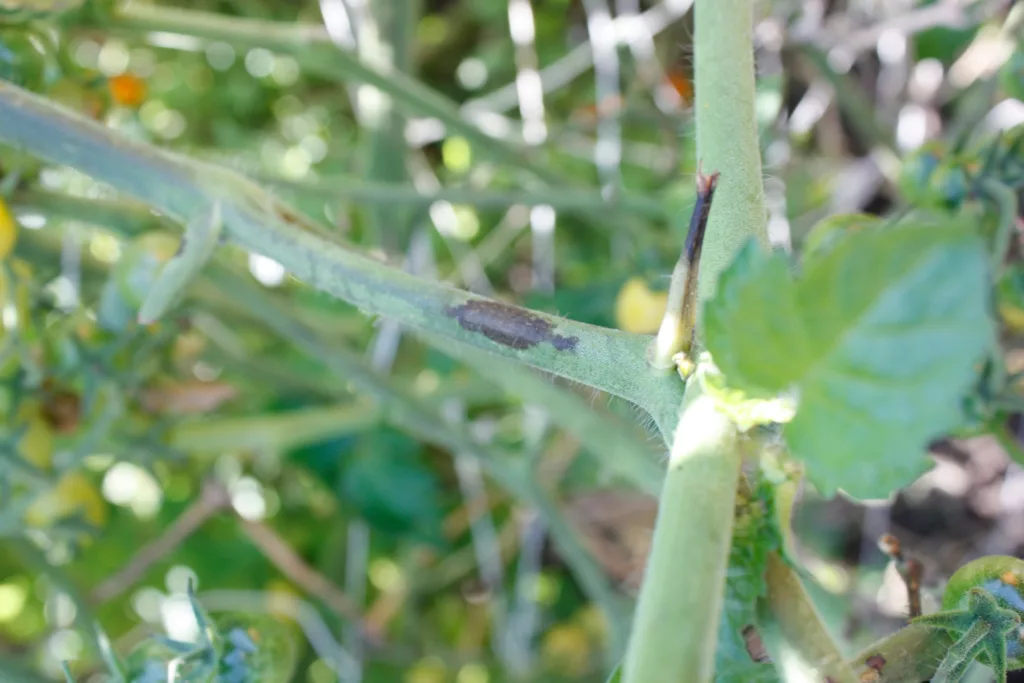
Although tomatoes get afflicted with multiple diseases, blight is very common. Blight is a fungal infection that travels by wind and also lives in the soil. It is easily identified on leaves or stems. When you see blight on the stem, it looks black, as if it has rotted through. Blight on leaves looks like large black splotches.
To slow down blight, you can cut off the affected leaves, however once it reaches the fruit, you won’t be able to eat the tomatoes anymore. Blight on tomatoes makes them taste rotten and is very unpleasant. The best thing you can do is remove the infected plant to prevent it from spreading to your other tomato plants.
To help prevent blight, we recommend keeping your tomatoes well pruned, to allow adequate airflow. Blight can also come from the soil through water splash (such as during a heavy rainfall). To lower the risk of blight, mulch under your tomato plants, or plant a crop that covers the soil well, such as sweet alyssum or sweet potatoes.
Check out our other articles:
- How to Protect Your Plants from Cucumber Beetles
- How to Grow Cucumbers From Seed to Harvest
- What the Calgary Water Main Break Can Teach Us In Our Gardens
- Drowning in Kale? Here are 9 Ways to Use Your Harvest!
- How to Grow Bush Beans from Seed to Harvest
Harvesting
Tomatoes can be harvested at any colour stage, once they grow to the full size the variety is expected to get to. Picking tomatoes when they are ripe is your best option for immediate use, however if animals keep beating you to your harvest, or you are nearing your first frost, you can pick your tomatoes green, or blush, and they will ripen inside.
If the summer is consistently hot (over 29°C), your tomatoes are less likely to ripen outdoors, and will stay green on the vine. If this describes your summer, pick the tomatoes and let them ripen indoors on your counter.
Finally, if you have a lot of rain, tend to overwater, or wait until the tomatoes are too ripe, they can split. You can avoid this by adjusting your watering schedule, picking them when ripe, or picking them before they fully ripen, allowing them to ripen indoors.
Seed Saving

Saving seeds from tomatoes is simple and fun! The first step is checking if your original plant is open-pollinated or an heirloom variety. If your plant is a hybrid, we don’t recommend saving seeds from it. This information should be available on the seed packet or on the seed company’s website.
Next, grab a ripe tomato from your garden! In order to harvest and store tomato seeds for next season, you will need to remove the gel that surrounds the seeds. If you look closely, you will see the jelly sac around each seed, which is there to prevent it from growing inside the tomato.
Our preferred method to save seeds is by scooping the seeds out of the tomato and putting them in a lidded container. Fill the container with water and let it sit on the counter for about a week, shaking it once every day or two.
After about a week, strain the seeds into a fine strainer (don’t lose them down the sink!) and rinse some water over the seeds. Lay the seeds out to dry on a plate for a couple of days. You can dump the seeds in a pile on the plate to dry, however we prefer to separate them when they are wet because it is easier to put them away at a later date. That’s it! You now have tomato seeds for next season.


