
Introduction
Did you know that sweet potatoes grow differently than other potatoes? Well, this is because sweet potatoes and regular potatoes aren’t even from the same family! Sweet potatoes come from the morning glory family, while regular potatoes are from the nightshade family. Considering they’re both called potatoes, who would have thought! When I first learned that sweet potatoes can’t be thrown in the ground like other potatoes, I felt very intimidated. I waited years before I got up the courage to try growing them. But..
Turns out, they’re pretty easy.
In this article we are going to discuss the two ways you can grow sweet potato slips indoors so that they are ready to be planted out in the spring, once all danger of frost has passed.
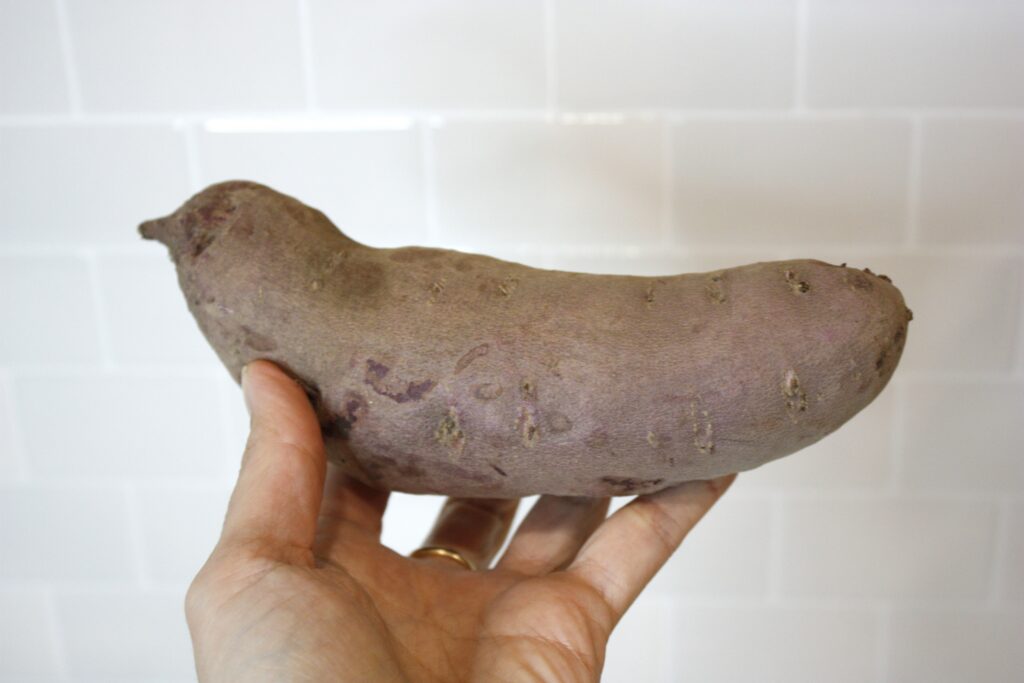
All photos in this article will be of organic purple stokes sweet potatoes that we picked up from Whole Foods, however this information applies to all sweet potatoes, including the orange variety! The first thing to know is that if you are growing your sweet potatoes from store bought potatoes, you will want to buy organic. Organic potatoes are less likely to have been sprayed with a sprouting inhibitor, which is important, because we need them to sprout!
If reading isn’t your thing, check out our video below!
Sweet Potatoes vs Regular Potatoes
Like we mentioned above, sweet potatoes grow differently than white potatoes because they are two different plants! There are some similarities because they are both root vegetables, but overall, they grow differently.
With regular potatoes, you can cut it into multiple pieces and plant it in your garden, or even plant the entire potato. The potato will grow leaves and roots with new potatoes growing below. The plant has upright stalks with small white/yellow flowers on it. And once the plant dies back it is ready to be harvested.
Opposite to regular potatoes, and due to our short growing season, sweet potatoes should be started indoors. Plants do grow off of the sweet potato, however these are called slips, and are cut off the potato to form separate plants. Finally, instead of tall, upright stalks, sweet potatoes grow as a vine.
Now that we have quickly discussed the difference in planting, let’s get into the two methods to grow sweet potato slips!
Subscribe for more garden tips and how-to’s
Ways to Grow Sweet Potatoes
The two ways that you can grow sweet potatoes is in soil, or in water. The soil method is significantly faster than the water method, however if you are short on space and have the time, the water method will work.
Below we will go through the two methods, the equipment needed to grow the slips and the steps to start growing your own sweet potatoes!

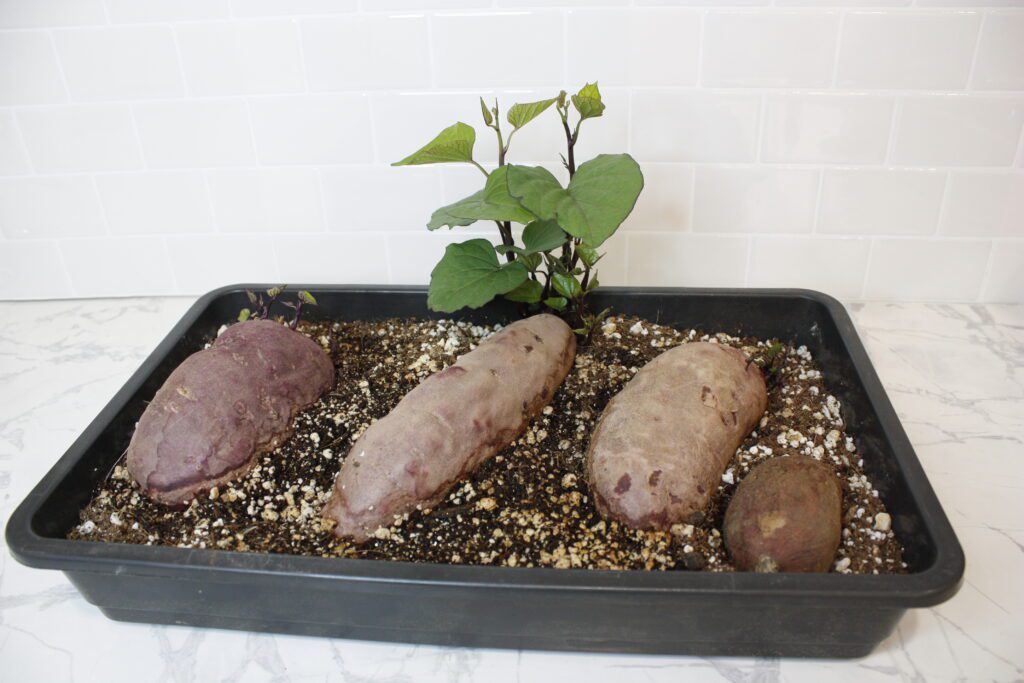
Note: the two potatoes in the above photo were started at the same time.
Want to learn more? Check out our other posts:
- How to Control Squash Vine Borers
- How to Grow Zucchini from Seed to Harvest
- How to Protect Your Plants from Cucumber Beetles
- How to Grow Cucumbers From Seed to Harvest
- How to Grow Bush Beans from Seed to Harvest
The Soil Method
Let’s start with the soil method first. To grow slips in soil, you will need: a deep tray – such as a plant tray or a roasting pan, soil with good drainage, a heat mat, grow lights and some potatoes.
The first step is to pre-moisten the soil. You will want it to be moist, but not too wet, to avoid rotting the potatoes. Once you have wet the soil, add it to the tray, filling the tray about one half to two thirds full.
Next, add the potatoes to the soil. Press them into the soil and move it back and forth to help bury them. You want at least half of the potato buried in the soil. If the potato is not half covered, add some more soil until it is.
And that’s it! Once the potatoes are in the soil, we are going to move the tray onto a heat mat under some grow lights. The heat and light help speed up germination, however if you do not have either, you can place it in a bright, warm place until it starts to sprout. Regularly check the soil to ensure it has not dried out, and water it when needed. Be sure not to water too frequently, to avoid the potato rotting.
In a couple of weeks you should start to see shoots coming out of the potato that is above the soil. This can take awhile, so be patient!
Subscribe for more garden tips and how-to’s
If you are enjoying this article, and want more prompts on when to grow, along with other gardening tips, subscribe to our newsletter!
The Water Method
Okay! Let’s move on to the water method. For this method you will need toothpicks, a jar or large cup, water and potatoes.
The first step is to determine which side of the potato will go in the water, and which side is the top. There are three ways to determine which side is which. The first, is if you can see roots on one end vs the other.
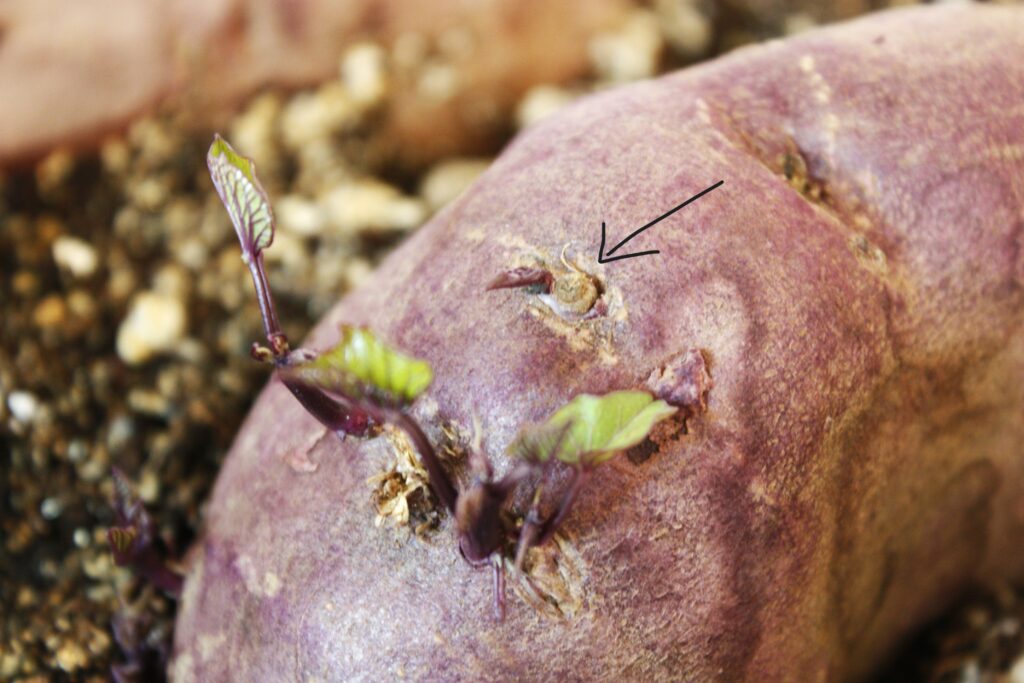
The second is if you can see more “eyes” on one end vs the other. The below photo shows what eyes look like, so you are looking out for these. The side with more eyes is what stays above the water, as the slips grow out of the eyes.
The final clue is to look at which side of the potato is more tapered – or pointed. This is more likely to be the root end, or the end you put in water. The photo below shows a potato with the tapered end down in water.
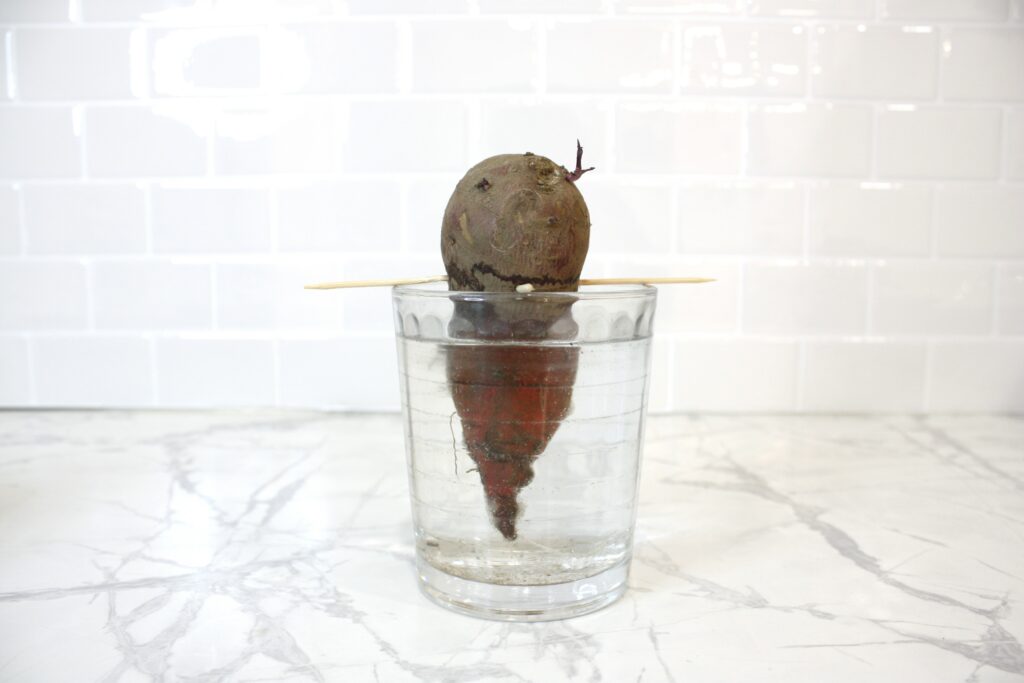
Once we’ve determined which side goes in the water, we are going to put the potato in the jar to test where to stick in the toothpicks. You want between a half to two thirds of the potato in the water. Testing it out before adding water is beneficial to ensure the potato fits in the jar or cup. This avoids a wet potato and needing to wash a jar!
Once you know where the toothpicks will go, stick them into the potato. You will need 4 toothpicks, one on each side of the potato to keep it steady.
Now that the toothpicks are in the potato, you can fill the jar or cup with water. If you took the potato out to fill with water, be careful not to fill the jar too high so that it overflows when you put your potato in.
Place the cup on a sunny window sill or under grow lights. This method can take a month or longer to see growth on the potato, so patience is key.
The last item to note is that you have to change the water out weekly to prevent any bacteria build up in the water.
Enjoying this article? You may enjoy these other articles:
- How to Control Squash Vine Borers
- How to Grow Zucchini from Seed to Harvest
- How to Protect Your Plants from Cucumber Beetles
- How to Grow Cucumbers From Seed to Harvest
- What the Calgary Water Main Break Can Teach Us In Our Gardens
Next Steps
Once the slips grow to about 6 inches, you will want to take a clean knife and cut them off the potato and put them in a cup of water to root. Once the roots have reached a few inches in length you can pot them up into potting soil and they will be ready for hardening off once the weather has warmed up!
One final note: if you leave your potato in the soil or water, it will continue to grow slips until you have reached the desired amount. Once you have as many slips as you need, throw the potato in the compost or green bin.
FAQ
Does it matter which side of the potato goes in the soil?
You can look at the potato to see if one side has more eyes on it than the other, but overall it does not matter which side goes in the soil
How close can you plant the potatoes to each other in the soil tray?
The potatoes can be planted quite closely, just an inch or two apart from one another
I started my sweet potato too early and now the vines are out of control. What do I do?
You can trim the vines and the plant will be totally fine! With the trimmed pieces you can either compost them, or you can root them in water like the original vine. This will result in more sweet potato plants!
My potato hasn’t sprouted, what do I do?
Depending on the method you are using, it can take weeks for your potato to sprout. If using the water method, it can take a month for sprouts to start showing. The soil method should take a week to two weeks to notice sprouts. If it has been longer than this, there is a chance your potato was sprayed with a sprouting inhibitor. If you are not using organic potatoes, try again with an organic potato.


